
PPF Installation Guide for Cars 2025
Protecting your car’s paint from daily wear and tear is essential for maintaining its value and appearance. Paint protection film (PPF) offers a durable shield against scratches, rock chips, and UV damage, keeping your vehicle looking flawless for years. But how do you install PPF correctly?
This PPF installation guide breaks down the entire process, step by step, to help you achieve professional results at home. Whether you’re a car enthusiast or just looking to save on professional installation costs, these PPF installation tips and techniques will ensure a smooth and long-lasting finish.
Tools and Materials You’ll Need
Before you start your PPF installation at home, ensure you have the right tools. Here’s a list of items you’ll need:
|
Tools/Material |
Purpose |
|
PPF Installation Kit |
Includes the film and applicator |
|
PPF Installation Gel/Solution |
It helps with smooth application |
|
Heat Gun or Hairdryer |
Conforms the film to curved surfaces |
|
Squeegee |
Removes air bubbles and wrinkles |
|
Microfiber Towels |
Cleans and dries the surface |
|
Blade or Cutter |
Trims excess film |
PPF installation is essential for maintaining your car’s exterior. It protects against scratches, rock chips, and UV damage while preserving your car’s resale value. Moreover, PPF enhances the overall appearance of your vehicle, keeping it looking brand new for years.
Step-by-Step Guide for PPF Installation
Step 1: Thoroughly Clean the Surface
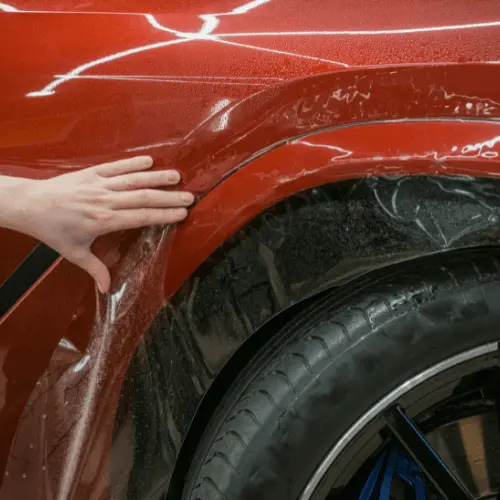
The first and most important step in the PPF installation process is cleaning the car’s surface thoroughly. Use car shampoo and water to remove dirt and debris. After washing, dry the surface with microfiber towels to prevent water spots. Additionally, use a clay bar to remove any stubborn contaminants like tar, tree sap, or industrial fallout.
Why this step matters: A clean surface ensures proper adhesion of the film and reduces the risk of bubbles or peeling later. Skipping this step may result in an uneven or damaged finish.
Step 2: Measure and Cut the Film
Once the surface is clean, unroll the PPF installation kit and measure it against the car panel. Cut the film slightly larger than the panel to allow for easier adjustments during application. Use a sharp blade or cutter to make precise cuts.
Tips for accuracy: Work on a flat surface and use a straight edge to ensure clean lines. For complex areas, like the bumper, measure multiple times to avoid waste.
Step 3: Apply the PPF Installation Gel
Spray the PPF installation gel generously onto the car panel and the adhesive side of the film. The gel acts as a lubricant, making it easier to reposition the film during application. If the gel dries out too quickly, reapply to keep the surface workable.
Pro Tip: Avoid spraying too much gel in one go, as this may make the film slippery and harder to manage.
Step 4: Position the Film on the Panel
Carefully place the film on the prepared car panel. Start from one edge and gently unroll the film onto the surface, ensuring it aligns correctly. If adjustments are needed, lift the film and reposition it before moving to the next step.
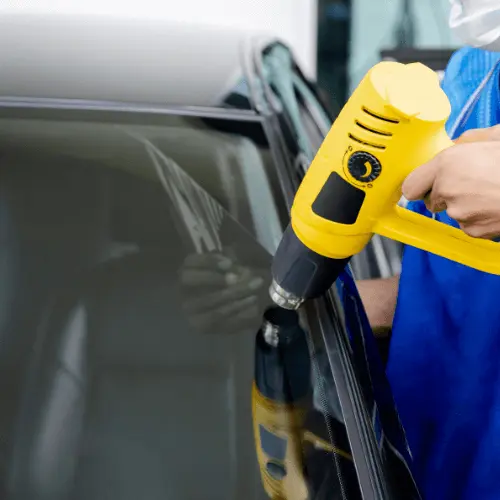
For curved surfaces: Use a heat gun or hairdryer to soften the film, allowing it to stretch and conform to the shape of the panel.
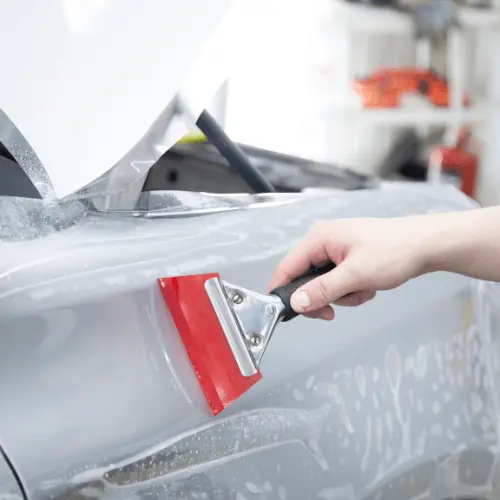
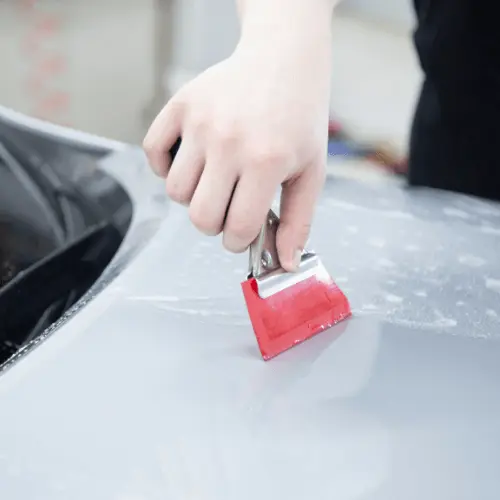
Step 5: Smooth the Film Using a Squeegee
This step is crucial for achieving a bubble-free finish. Begin in the center of the panel and use a squeegee to push out air bubbles and excess gel. Work your way outward, using firm, even strokes. Additionally, heat tricky areas like corners or edges to help the film adhere better.
Why this step is essential: Squeegeeing ensures the film adheres smoothly, without wrinkles or trapped air, which can compromise its durability.
Step 6: Trim Excess Film
Using a sharp blade or cutter, carefully trim the excess film along the edges of the panel. Take your time to ensure clean cuts, as uneven edges can peel over time.
For precision: Hold the blade at a slight angle and work in small sections.
Step 7: Final Check and Maintenance
Inspect the panel for any bubbles, wrinkles, or imperfections. Use the squeegee and heat gun to address minor issues. Allow the film to cure for 24–48 hours before exposing your car to water or extreme temperatures.
Maintenance Tip: Clean the film regularly with mild soap and water to maintain its clarity and durability.
Testing the PPF Installation Process
We tested these steps on a mid-sized sedan, focusing on areas prone to damage, such as the hood, bumpers, and side mirrors. After thoroughly cleaning the car and applying the film, we observed that the process required patience and attention to detail, especially on curved surfaces.
For instance, applying the PPF installation gel ensured the film was easy to adjust during placement. However, the squeegee stage demanded consistent pressure to remove all air bubbles effectively. Using a heat gun proved essential for conforming the film to tricky corners, and trimming the excess film required a steady hand for clean edges.
Final Result: After completing the steps, the car had a flawless finish, with no visible bubbles or wrinkles. The protective film blended seamlessly with the paint, demonstrating how following these steps can achieve professional results even at home.
PPF Installation Tips for Success
- Plan your work area: Choose a dust-free and well-lit space for the installation.
- Take your time: Rushing through the process increases the chances of errors.
- Practice on smaller panels: Start with less complex areas, such as mirrors, to build confidence.
- Watch tutorials: A PPF installation tutorial can help visualize tricky steps.
Conclusion
Installing paint protection film is a highly rewarding process that protects your vehicle and preserves its value. By following these detailed steps, using the right tools, and practicing patience, you can achieve a professional finish at home. Whether you opt for DIY installation or professional help, PPF installation ensures your car stays protected and looks great for years to come.
I am extremely impressed along with your writing abilities as well as with the layout to your weblog. Is that this a paid subject matter or did you modify it yourself? Either way keep up the nice high quality writing, it is rare to peer a nice weblog like this one nowadays!
I am really inspired with your writing abilities as neatly as
with the layout to your blog. Is this a paid subject matter
or did you customize it yourself? Either way keep up the nice high quality writing, it is rare to see a great
blog like this one nowadays. Snipfeed!
Feel free to visit my page Fiverr Affiliate