How to Install Window Tint? 2025 Guide
So, you’ve finally decided to protect your car’s privacy with window tints. You’ve found the best option, but now you’re struggling to apply it without damaging your car. We’ve got you covered. Whether you are a newbie looking to achieve a flawless finish without bubbling, peeling, or creases, or someone experienced seeking to refine your technique, learning how to install window tint can seem like a daunting task. It requires careful preparation and the right approach to achieve a professional-quality result.
If your goal is to enhance privacy, reduce glare, or boost energy efficiency, mastering how to install window tint correctly is essential. In this guide, we’ll walk you through the steps to ensure a smooth, professional result. From choosing the right materials to avoiding common mistakes, this guide will make your DIY tinting project stress-free and effective.
Car window tint is a common addition for vehicles, serving both practical and aesthetic purposes. The tint is typically made from a thin layer of polyester film, coated with special chemicals that can block or absorb specific wavelengths of light. These coatings often include dyes, metals, or ceramics, which determine the level of tint and heat reduction. This step-by-step guide will help you install car window tint yourself, saving money and giving you the satisfaction of completing the project on your own.
Tools and Materials
The primary benefit of window tinting is its ability to block harmful ultraviolet (UV) rays from the sun, protecting your skin while driving. It also enhances privacy by making it difficult for outsiders to see inside the vehicle. Furthermore, tinting gives cars a sleek, polished look. While tinting may seem like a difficult and time-consuming process, it is manageable with the right tools and a little patience. Let’s explore the tools and materials required for installing car window tint successfully.
- Glass Cleaner – For cleaning the surface of the windows.
- Blue Max Squeegee – Helps smooth out the tint film and remove air bubbles.
- Olfa Blade (with Stainless Steel) – A sharp blade for cutting the tint film without damaging the glass.
- Sharpie – For marking measurements on the tint film.
- Scrubby Pad or Dishwasher Scrub Pad – Useful for cleaning stubborn dirt from the glass.
- Sturdy Card (e.g., debit card) – For pressing the tint film into corners and edges.
- Blue Card or DIY Tri-Edge Soft Triangle – A specialized tool for detailed smoothing.
- Anger Squeegee – Designed specifically for car window tinting to reach tight areas.
- Scraper or Scraper Blade – For removing old tint or cleaning off debris.
- Microfiber Cloths – To wipe and dry the glass without leaving lint.
- Soap Solution – Made with water and dishwashing liquid for film application.
- Dishwashing Liquid – To mix the soap solution for easy film positioning.
- Tape Measure – For accurate cutting and sizing of the tint film.
General Preparation (for All Windows):
1. Clean the Windows:
Before starting, it’s important to understand how to install window tint properly, and that begins with a clean surface.
- Thoroughly clean the inside of your car windows using a glass cleaner and a lint-free cloth. Make sure to remove any dust, dirt, and oils to ensure the tint adheres properly.
- To make sure there’s no impurity, it’s essential to clean both the outside and inside of the windows.
2. Measure and Cut the Tint Film:
- Measuring the window and cutting the tint film to be slightly larger than the window’s dimensions is important to understand how to install window tint on a car effectively . You can always trim excess later.
- Be sure to cut the film using a utility knife with a fresh blade for clean edges.
3. Apply Soapy Water:
Spray a generous amount of soapy water onto the inside of the window to install window tint successfully. This will help you position the tint film and prevent it from sticking prematurely.
Now that you’ve completed these initial steps, you’re ready to continue learning how to install window tint in the next stages of the process. Taking the time to carefully prepare your windows ensures a smoother, more professional installation, helping you avoid common mistakes like bubbles or uneven application.
Step-by-Step for Each Window:
Side Windows:
1. Place the Tint Film:
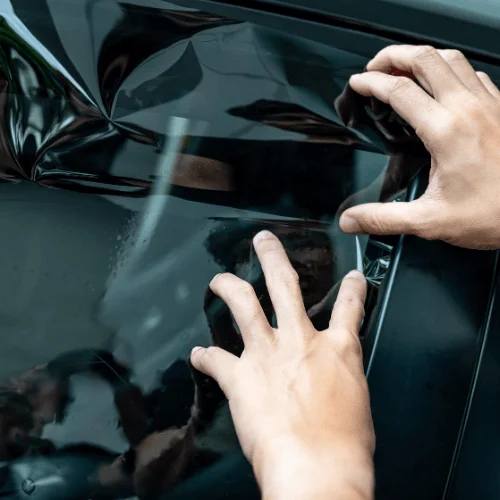
- Carefully position the tinted film on the window, making sure the adhesive side is facing the glass to install window tint effectively. The film should overlap the edges slightly.
- Use your hands or a squeegee to smooth out the film and remove any air bubbles. Be sure to keep the film wet with the soapy water to allow for easy repositioning.
2. Squeegee the Film:
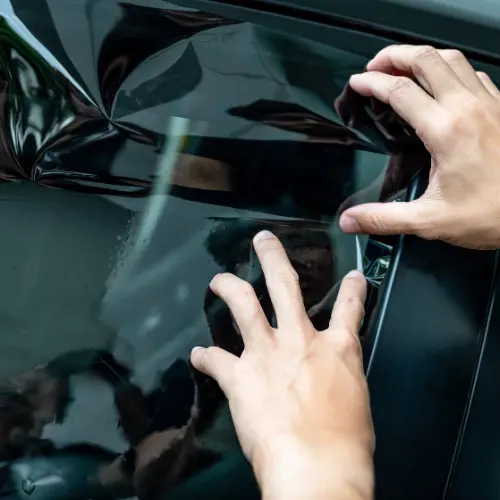
- When learning how to apply auto window tint on side windows, start from the center of the window and work your way outwards with the squeegee, pushing the water and air bubbles towards the edges.
- Keep applying pressure evenly to avoid creating new bubbles. Take your time to ensure it’s perfectly aligned.
3. Trim the Excess Film:
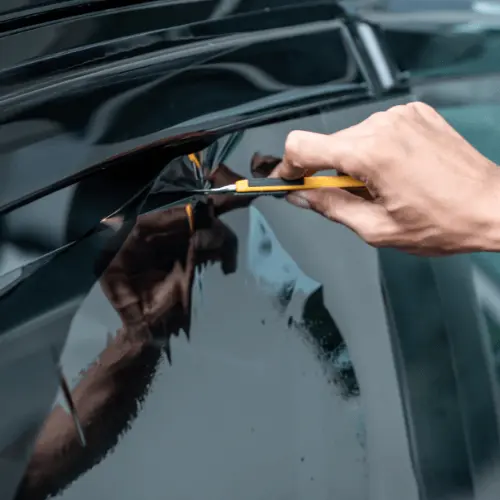
- Once the film is smooth and aligned, use a utility knife to trim the excess tint along the edges of the window. Be sure to cut along the rubber seals of the window for a clean edge.This step is key when figuring out how to apply automotive window tint correctly, as it ensures the tint fits perfectly within the window frame.
4. Final Squeegee:
- After trimming, go over the tint one more time with the squeegee to ensure a strong bond and remove any remaining water underneath.
Rear Window (with Defrost Lines):
1. Prepare the Rear Window:
- To install window tint on the rear window properly,the first step is preparing the window.For rear windows with defrost lines, the process is similar to the side windows, but with additional attention to avoid damaging the defrost lines.
- When applying the tint, avoid placing the film directly over the defrost lines.
2. Apply Tint Film:
- Now that you know the preparation of how to install window tint on a rear window,place the tint film on the rear window and adjust it to avoid covering the defrost lines.
- Spray the window with soapy water and position the tint as needed.
3. Squeegee and Smooth:
- Use a squeegee to remove any air bubbles and smooth the film onto the window. Make sure to work carefully around the defrost lines to avoid damaging them. This step is crucial when learning how to apply adhesive window tint to ensure a smooth, professional finish.
4. Trim Excess Film:
- Trim the excess tint around the edges of the window, ensuring the film doesn’t overlap the rubber seals or defrost lines.
Front Windshield:
1. Cut and Position Tint Film:
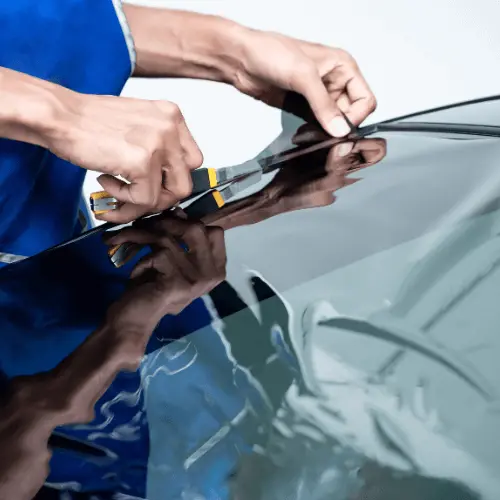
- To learn how to install the front window tint, cut the tint film for the windshield, leaving extra around the edges to make adjustments. You may need to cut it into sections if applying the tint across the entire windshield.
- Place the tint film on the windshield, ensuring the adhesive side is facing the glass.
2. Squeegee the Tint:
- Use a squeegee to smooth out the film. Work from the center outwards to remove air bubbles. Be extra careful not to let the film overlap the windshield’s edges.This step is essential when learning how to apply window tint without bubbles. Taking your time will result in a smoother, cleaner application.
3. Trim Excess Film:
- Carefully trim the edges using a utility knife, making sure the tint fits neatly against the rubber seals and contours of the windshield.This final step is important when figuring out how to install window tint film on car to achieve a precise, clean look around the edges.
Step-by-Step for Curved Surfaces:
Curved windows can be tricky, especially for side windows and rear windows with a lot of curvature. Here’s how to deal with them:
1. Heat the Tint Film:
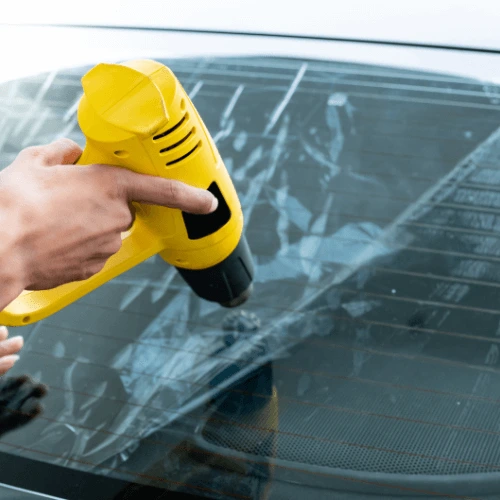
- For curved windows, use a heat gun to gently warm the tint film after applying it to the window. This makes the film more flexible and helps it conform to the curves of the glass.By understanding how to install window tint on curved glass, you can achieve a smooth finish.
- Be sure to keep the heat gun moving and don’t overheat the film, as this can cause it to warp or damage the adhesive.
2. Apply Tint Using a Gentle Stretching Technique:
- Once heated, gently stretch the tint film over the curved area. Start from one edge and work your way across, using the heat to make the film conform to the window.This technique will help you master how to put window tint on glass, even on more challenging surfaces.
- Smooth the tint into place with your squeegee, working from the center outwards to push out air bubbles.
3. Trimming for Curves:
- When trimming the film on curved surfaces, it’s crucial to cut it precisely along the contour of the window. Use a utility knife and ensure your cuts are smooth and follow the shape of the window. Proper trimming is an important step to install car tint film effectively on curved glass.
Final Steps:
1. Allow the Tint to Dry:
- After installing the tint on all windows, leave your car windows up for 24-48 hours to allow the tint to properly adhere and dry. Avoid rolling the windows down during this time.While it might seem like a slow process, how easy it is to install window tint becomes apparent when you follow each step carefully. The film may appear a bit hazy initially, but it will clear up as it fully cures.
- The film may appear a bit hazy initially, but it will clear up as it fully cures.
2. Clean the Tint:
- After the tint has dried, clean it gently with a soft cloth to remove any remaining water spots or fingerprints.
Additional Tips:
- Work in a Clean Environment: To prevent dust and debris from sticking to the film, try to install the tint in a dust-free garage or indoor space.
- Patience is Key: Take your time with each step. Rushing the installation can lead to mistakes, especially when dealing with curves and edges.
- Use Quality Materials: High-quality tint film will be easier to work with and provide better results, so make sure you’re using a good brand.
AfterCare Instructions:
Keep Windows Rolled Up for Three Days:
After you’ve followed how to install window tint successfully, it’s important to allow the film to cure. While tinted windows provide immediate benefits, the adhesive securing the film to the glass requires time to bond fully. For the best results, keep your windows rolled up for 2-4 days. Rolling the windows down too soon can cause the tint to peel, so be patient during this curing period. This is especially important when considering how long to apply window tint to ensure a lasting bond.
Avoid Cleaning the Inside of Windows for a Week:
After installing the tint, wait at least a week before cleaning the inside of the windows to ensure the film is fully cured. When you do clean them, use a microfiber cloth or soft paper towel to gently wipe. Since the tint is applied on the inside, it’s less exposed to dirt and debris from the road. This is a crucial part of understanding how to install window tint step by step for proper aftercare.
Use a Gentle Cleaner:
After the tint has dried completely, clean it with mild soapy water and a soft, non-abrasive cloth. Avoid using ammonia-based cleaners, as they can damage the tint. Proper care after the installation, like using the right cleaner, helps maintain the integrity of the tint, especially when you’ve followed the steps in how to install car tint film.
Avoid Using Sharp Objects Near Tint:
Quality tints will make it easy for you to learn how to install window tint on car windows effectively.While quality window tints come with a scratch-resistant coating, they are not entirely scratch-proof.Be mindful of sharp or hard objects like boxes, sports equipment, or even the metal buckle of your seatbelt, which can easily damage the film. During loading and unloading, take extra care to prevent any accidental damage to the window tint.
Conclusion
Installing window tint yourself can be a rewarding and cost-effective way to enhance your vehicle’s look and comfort. By following the steps outlined above, you can achieve a professional-quality finish without the need for professional help. While DIY tinting allows you to save money, it’s important to approach the task with care and patience.
Pay attention to details, especially when working with curved surfaces, and ensure you’re using the right tools and high-quality materials. With proper preparation and the right technique, you can avoid common issues like bubbling, peeling, and discoloration. Remember, taking your time and ensuring a clean, dust-free environment will lead to the best results. By the end of the process, you’ll have successfully installed window tint that not only improves privacy but also adds a sleek, modern touch to your vehicle.


